OSI Wireless Strobe Alarm Siren
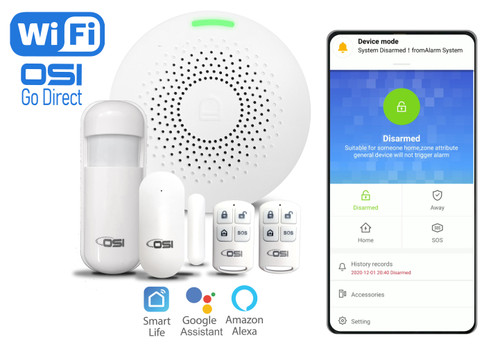
Our OSI Wifi Alarm System Protect your home with a Wireless Alarm Strobe Siren! This can be paired to your OSI Smart Wireless Alarm System. Once the alarm is tripped this will strobe light along with a loud siren. Installation is super simple! Plug into any electrical outlet with the USB power cable and screw onto wall! Generally installed in the wall or doorway and other places. It has an internal rechargeable lithium back-up battery in case of a power outage. If you are needing to add an additional wireless siren to your OSI Smart Wireless Alarm System, then this is the product you've been looking for!
OSI made these accessories available separately so customers can expand their OSI Smart Wireless Alarm System.
- EASY INSTALLATION: Installation is flexible and convenient. Plug into any electrical outlet with the USB power cable and screw onto wall.Generally installed in the wall or doorway and other places
- SMALL & PORTABLE: The product is small, flexible and easy to carry, so you can easily move it to another location in your home or business or take with you whenever you move!
- WORKS WITH OSI SMART WIFI ALARM SYSTEM: Strobe light with loud siren, pairing with door/window sensors, motion detectors to form an effective standalone home house apartment security system.
- IMPORTANT! WATCH THE INSTALLATION VIDEO! For more placement tips, do's and do nots located in the Video Tutorial tab on this page.

Use with the OS Smart Wireless Alarm System
Our OSI Wifi Alarm System is a low commitment, easy to set up, and effective self-monitoring DIY system. Suits perfectly for home owners, small business owners, and is especially favorite for renters of all types and those who need to move frequently for their job! Since hard wired installation are not allowed in rental units, this is an affordable solution to get you protected where ever you go. Set up within minutes but feel protected 24/7!
Quick Installation Guide

STEP 1: Connect Siren to Alarm System via Wi-Fi
- Move switch from off to on position. Then go into the OSI Smart Wireless Alarm System display menu and select "Parts".
- Then on the Alarm Siren and press the "SET" button until you hear 3 Beeps then let go immediately and the light on the siren should be flashing quickly. (if you heard 4 beeps you waited too long. In this case start this step over again)
- Then go back again to the alarm display and select "Siren Learn" button. Once you see "Learn Signal Sent" on the display, programming is complete.
- Note: if you need to RESET the siren (unpair), hold the Siren Learn Button until you hear 4 Beeps.

STEP 2: Screw base onto wall
Screw base on to the wall. Ensure you use the plastic wall anchors if placing on drywall and there is no stud behind it. You do not need anchors if you are screwing into a hard surface. Once it is securely fastened to the wall place the siren over the base until notches align (you should feel the siren go in a bit. Then turn clockwise until it locks in place. If you need to remove for any reason, just twist counter clockwise and pull out.

STEP 3: Place on Window or Door
Plug in the included micro usb charging port into the siren and plug into the wall. If there is a power failure the back-up battery will last between 8 to 10 hours. Once power resumes it will automatically recharge the internal lithium back-up battery.
NOTE: For set up help, placement tips, do's and do nots please watch installation video on this amazon product listing page
What's Included?
- 1x Wi-Fi Strobe Siren
- 1x Manual
- Screws and wall anchors
- USB Power cable & adaptor
Specifications
- Power output DC5V 1A
- Standby current ≤ 13mA
- Alarm current ≤ 230mA
- Frequency 315MHz/433MHz(Optional)
- Code SC 2262 IC / 4.7MΩ
- Working temperature -20℃ ~ +55℃
- Working humidity 40% ~ 80%RH
- Backup Battery AAA 7.4V
Specifications
- Works with the OSI Wireless Alarm System
- Plug into any electrical outlet.
- Back up battery for power failure will supply power up to 24 hours
- When triggered the siren makes a high pitch noise to scare off introduers
- This product can be installed in only a few minutes!
(1 review) Write a Review
1 Review Hide Reviews Show Reviews
-
Works perfect
Works perfect


